[ROM] [5.1.1] [MT6592] Temasek CM12.1 For Innjoo Fire Plus 3G

With the breakthrough in the world of MTK, lots of custom roms have found their way to many Mediatek devices. Thanks to Fire855 for the first Bootable CM12.1 on MTK.

This is another CM12.1 based lollipop rom for MT6592 devices running Android Kitkat with kernel 3.4.67.
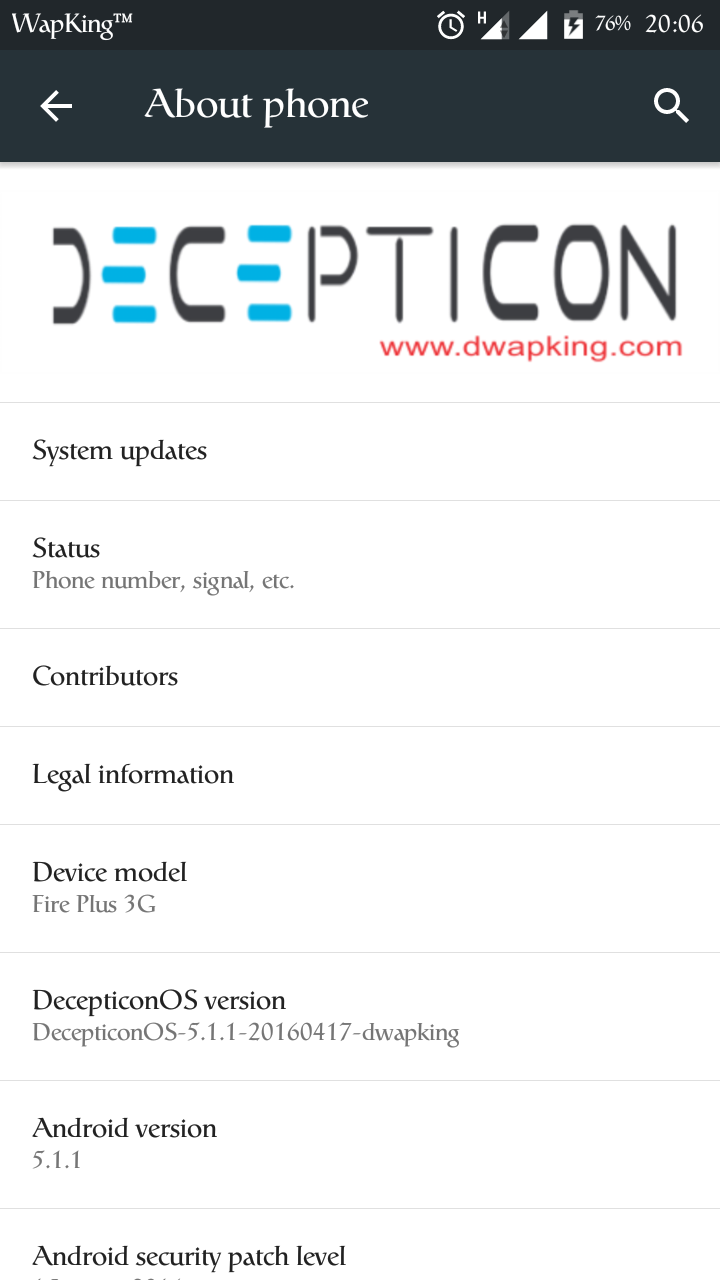
The ROM has been built by Rohan ft. TRT and ported for Innjoo Fire Plus 3G by yours sincerely d'wapking™. It's bugless and smooth with full resolution camera 13x5mp, with every other thing working perfectly.

Temasek CM12.1 - unofficial, is an aftermarket ROM for MT6592 based on real Android 5.1.1 CM12.1 lollipop..
More features have been integrated into the ROM by the developer. The ROM looks similar to Resurrection Remix. So for RR lovers who want to try something new, here's your opportunity.


Note: The ROM can be ported to all MT6592 devices running Android Kitkat with kernel 3.4.67


HOW TO FLASH
  1. Download both ROMs and place at your sdcard root
  2. Backup your current ROM
  3. Format data, cache, dalvik and system
  4. Flash the original ROM first
  5. Flash the patch provided for InnJoo Fire Plus 3G
  6. Clear cache/dalvik
  7. Reboot
Share:

[ROM][5.1.1][MT6592] DECEPTICON OS FOR INNJOO FIRE PLUS 3G

Another lollipop 5.1.1 ROM for the Innjoo Fire Plus 3G ported by d'wapking™. With all features supported including the superb camera 13x5mp, FM radio, Xposed® ready and battery friendly.
Decepticon_OS is an aftermarket ROM based on real Android 5.1.1 CM12.1
The ROM packs a lot of features and customizations that ensures smooth user experience. No bugs reported and lag-free.
The ROM could also be ported to all MT6592 devices running Android Kitkat with kernel 3.4.67.
Download and install.

Many thanks to Michael Jay and his Decepticon_OS team


  • Decepticon OS team (Alif and Michael Jay)
  • Wapking


Share:

[ROM] [6.0.1] UPGRADE YOUR HTC M8 TO MARSHMALLOW


You  can now upgrade your HTC M8 to the latest Android 6, Marshmallow via the Resurrection Remix Custom ROM.

Resurrection Remix is an aftermarket ROM for the HTC M8 device based on real Android 6.0 Marshmallow.
The ROM packs a lot of features and customizations which ensure clinical user experience and personalization options.
To enjoy this ROM, you must be rooted and have custom recovery installed.


Full features and changelogs can be found on the official site www.resurrectionremix.com
  • Based on Android 6, Marshmallow
  • Carrier label 
  • Recent panel 
  • Theme chooser
  • Animations
  • Widgets
  • Buttons
  • Gestures 
  • PitchBlack™
  • Transitions
  • Personalizations
  • Heads up notification  
  • Status bar mods
  • And many more 

How To Install
NOTE: THIS ROM IS FOR HTC M8. DO NOT INSTALL IN ANOTHER DEVICE.
BY PROCEEDING TO INSTALL THE ROM, YOU AGREE THAT YOU KNOW WHAT YOU ARE DOING & ARE RESPONSIBLE FOR ANY DAMAGES TO YOUR DEVICE.
Further details about this rom can be found on the official website

  • You must be rooted and have a custom recovery installed. 
  • Copy the ROM.zip to the root of your storage (not in any folder) 
  • Perform a thorough wipe of the system, data, cache and dalvik partitions. 
  • Select install zip, locate the ROM.zip file and install.
  • Also install GApps package of choice 
  • Enjoy your new rom.  


  • CyanogenMod
  • Team RR
Share:

[ROM] [5.1.1] Resurrection Remix Custom ROM For Samsung S3 I9300


The users of the Samsung Galaxy S3 I9300 can still enjoy the latest custom roms on their device, thanks to the seasoned developers who strive to keep the phone up to date with the latest Android versions.

Resurrection Remix is an aftermarket ROM based on real Android 5.1.1 lollipop. As always, it packs a lot of features and customizations which ensure clinical user experience.


Full features and changelogs can be found on the official site www.resurrectionremix.com
  • Carrier label 
  • Recent panel 
  • Theme chooser
  • Animations
  • Widgets
  • Buttons
  • Gestures 
  • PitchBlack™
  • Transitions
  • Personalizations
  • Heads up notification  
  • Status bar mods
  • And many more 
How To Install
NOTE: THIS ROM IS FOR SG S3 I9300. DO NOT INSTALL IN ANOTHER DEVICE.
BY PROCEEDING TO INSTALL THE ROM, YOU AGREE THAT YOU KNOW WHAT YOU ARE DOING & ARE RESPONSIBLE FOR ANY DAMAGES TO YOUR DEVICE.
Further details about this rom can be found in this XDA thread

  • You must be rooted and have a custom recovery installed. 
  • Copy the ROM.zip to the root of your storage (not in any folder) 
  • Perform a thorough wipe of the system, data, cache and dalvik partitions. 
  • Select install zip, locate the ROM.zip file and install.
  • Also install GApps package of choice 
  • Enjoy your new rom.  


Resurrection Remix 5.1.1 For SG S3 I9300
Download GApps for 5.1.1 from www.opengapps.org


  • CyanogenMod
  • Team RR
Share:

[ ROM] [5.1.1] Resurrection Remix Custom ROM For LG G3 INT D855


Users of the LG G3 D855 International version can now upgrade their phones to Android 5 lollipop by flashing this custom firmware.

Resurrection Remix is an aftermarket ROM based on real Android 5.1.1 lollipop. As always, it packs a lot of features and customizations which ensure clinical user experience.

Features
Full features and changelogs can be found on the official site www.resurrectionremix.com


  • Carrier label 
  • Recent panel 
  • Theme chooser
  • Animations
  • Widgets
  • Buttons
  • Gestures 
  • PitchBlack™
  • Transitions
  • Personalizations
  • Heads up notification  
  • Status bar mods
  • And many more 
How To Install:

NOTE: THIS ROM IS FOR LG G3 D855 INT. DO NOT INSTALL IN ANOTHER DEVICE.
BY PROCEEDING TO INSTALL THE ROM, YOU AGREE THAT YOU KNOW WHAT YOU ARE DOING & ARE RESPONSIBLE FOR ANY DAMAGES TO YOUR DEVICE.
Further details about this rom can be found in this XDA thread

  • You must be rooted and have a custom recovery installed. 
  • Copy the ROM.zip to the root of your storage (not in any folder) 
  • Perform a thorough wipe of the system, data, cache and dalvik partitions. 
  • Select install zip, locate the ROM.zip file and install.
  • Also install GApps package of choice 
  • Enjoy your new rom.  


  • CyanogenMod
  • Team RR
Share:

[ROM] [5.1.1] OctOS For LG G3 d850 AT&T

The OctOS-team has once again released the Lollipop 5.1.1 stable ROM for the LG G3 AT&T d850 version. The ROM includes all OctOS features and was built based on CyanogenMod 12.1 Android Lollipop version.
OctOS is an aftermarket ROM based on real Android 5.1.1 Lollipop. It packs lots of customizations and features which ensure brilliant performance and quality user experience.


How to install
NOTE: THIS ROM IS FOR LG G3 AT&T D850 VARIANT. DO NOT INSTALL INTO ANY OTHER DEVICE..
BY PROCEEDING TO INSTALL THIS ROM, YOU AGREE THAT YOU KNOW WHAT YOU ARE DOING AND REMAIN SOLELY RESPONSIBLE FOR ANY DAMAGE TO YOUR DEVICE.

  • You must be rooted and have Custom recovery installed.
  • Copy the downloaded ROM into the root of your storage (not in any folder) 
  • Make a thorough wipe of the System, data, cache and dalvik partitions. 
  • Select install from zip 
  • Locate the ROM.zip and install 
  • Also install the GApps package 
  • Enjoy your new ROM.. 


Download any suitable open GApps 5.1.1 package from opengapps.org 


CyanogenMod, AOKP, SLIM, OMNI ROMS
TEAM OCT_OS

Share:

MM Update Coming To Sony SmartWatch 3

Good news to all owners of The Sony SmartWatch 3 as the device is now getting the Marshmallow update (Android Wear 1.4)..


The update should be available for all devices in about one week, report says. This update pushes Google that much closer to updating all Android Wear smartwatches to the new version (isn't it nice when OS updates are centralized like that?).

FEATURES
The 1.4 update brings support for
* calls using a loudspeaker (for those watches that have one)
* dictating messages for chat apps (Hangouts, WhatsApp, Viber, WeChat and a few more); and
* additional gesture support.

PS: The update will arrive over the air, but if you need it now, you can download it from here.
Share:

Huawei P9 vs P9 Plus - What You Need To Know

Huawei's charge towards becoming a global brand continues with the Huawei P9 and P9 Plus. Both are sleek metal phones with a powerful chipset and a unique dual-camera setup, the duo is all set to tackle the global flagships.

The Huawei Mate 8 is taking on the large phablets with its 6" screen, so it leaves the P9 to battle the 5-inchers - Galaxy S7, LG G5, HTC 10, you name it. Let's play a quick game of "2016 flagship bingo" and see if the Huawei checks all the right boxes.


Huawei P9 at a glance:


  • Metal unibody, 6.95mm thick
  • 5.2" IPS LCD screen with 1080p resolution (424ppi)
  • Android 6.0 Marshmallow with EMUI 4.1
  • HiSilicon Kirin 955 chipset (16nm): 4x Cortex-A72 at 2.5GHz + 4x Cortex-A53 at 1.8GHz, 3GB/4GB of RAM, Mali-T880 GPU
  • 32GB/64GB storage; microSD slot
  • dual 12MP camera with Hybrid autofocus, dual-LED flash; 1080p video; 8MP selfie camera
  • Dual SIM (hybrid slot); LTE Cat. 6 with global roaming; USB Type-C; Wi-Fi a/b/g/n/ac, Bluetooth 4.1, NFC
  • Fingerprint reader on the back
  • 3,000mAh battery (non-removable)


The only thing that's "off" is the screen resolution - 1080p instead of QHD. Huawei's CEO has long held that QHD is a waste of battery life and he stands by this claim over a year later.

It's definitely not due to a lack of processing power - Huawei has been building up its chipset brand and the latest HiSilicon Kirin 955 is a proper beast. It combines four Cortex-A72 cores at 2.5GHz (plus four "little" A53 cores) with a Mali-T880 GPU, basically what the Exynos 8890 would have been if Samsung didn't switch to custom "big" cores.

Design-wise, the LG G5 is in for some company as the Huawei P9 also sports a dual-camera setup and fingerprint reader on the back of its metal unibody.

The camera was co-designed with Leica, the iconic camera maker, and has a unique setup - two 12MP sensors, one of which shoots in color, the other in Black & White. We'll get into the how and why later.

P9 Plus
The Huawei P9 Plus offers a larger screen for those who have left 5" screens in their rear view mirror. The Plus version brings a 5.5" screen, but switches to AMOLED tech and keeps the 1080p resolution again. It also features the Press Touch technology that was initially restricted to the 128GB version of the Mate S. The bigger chassis brings a bigger battery too, one that charges quickly thanks to dedicated hardware.

The P9 Plus will have to share a room with the Mate S (5.5" AMOLED), but with a much improved camera and chipset the new flagship has little to worry about.

Huawei P9 Plus at a glance:


  • Metal unibody, 6.99mm thick
  • 5.5" AMOLED Press Touch screen with 1080p resolution (401ppi)
  • Android 6.0 Marshmallow with EMUI 4.1
  • HiSilicon Kirin 955 chipset (16nm): 4x Cortex-A72 at 2.5GHz + 4x Cortex-A53 at 1.8GHz, 4GB of RAM, Mali-T880 GPU
  • 64GB storage; microSD slot
  • dual 12MP camera with Hybrid autofocus, dual-LED flash; 1080p video; 8MP selfie camera (with AF)
  • Dual SIM (hybrid slot); LTE Cat. 6 with global roaming; USB Type-C; Wi-Fi a/b/g/n/ac, Bluetooth 4.1, NFC
  • Fingerprint reader on the back
  • Stereo speakers
  • 3,400mAh battery with dual-IC Rapid charge 


Share:

[UPDATE][LATEST] NOW YOU CAN REQUEST FOR YOUR DEVICE'S ROM

CM custom ROM

Starting from April 07, 2016, you can now request for the ported version of any ROM of choice for your device. However, only 32bt MTK chipsets (MT65xx) are supported for now. Other chipsets shall follow in the near future.

How To Request For Your ROM(s)
1. Choose any ROM of choice meant for your device's CPU
2. Copy the following system folders (/system/etc, lib, and build.prop,) from your backup or using a suitable file manager
[you can use any file manager such X-plore. ES, Root explorer, etc to navigate to root/system then copy the entire folder]
3. Also copy your boot.img 
4. Make a .txt (or any other text format) file, stating your phone's specifications including the:
  • manufacturer
  • model and variant (if any)
  • chipset
  • current stock ROM version
  • kernel version
  • * Mount points in updater script 

* if you don't know how, Google how to obtain the mount points using MTKDROID TOOLS. If you still can't get it, then I'll have to use the default values

For eg Specs.txt
  • Infinix
  • X551 (16+1)
  • MT6592
  • KitKat 4.4.2
  • Kernel 3.4.67
  • * Sys=5, Cache = 6, data = 7
5. Compress all the files into an archive (.zip, .rar)
6. Name the file with the Brand and model names (e.g. InfinixX551.rar)
7. Upload the compressed files to any site of choice (e.g. G-drive, mega, 4shared, dropbox, datafilehost, mediafire, etc).
8. Send the Compressed file link to me via email to dwapking@gmail.com 
9. I'll contact you when the port is available.

NOTE: You shall test the ROM yourself to identify any glitch(es) and report as soon as possible.

The  archive (e.g InfinixX551.rar) should contain the following:
  • System
  • Boot.img
  • Specs.txt
 Hope this would help everyone to obtain a suitable custom ROM for their device. Courtesy - D'WapKing
Share:

[GUIDE] HOW TO MAKE BOOT LOGO FOR ALL MTK DEVICES

Even if you do not know what boot logo means, don't be scared. It's quite simple.
The boot logo is the very first image you see when you power your phone just before the boot animation plays. If you are running stock ROM, the you must probably have the company's name (or logo) as the boot logo.
However, if you are running a custom ROM, it's possible that the ROM has an embedded boot logo which installed the very moment you flashed the device.
Now you are going to learn how to make your own custom logo images with any photo of choice (including your picture).


REQUIRED:
  • LOGO BUILDER
  • MICROSOFT .NET 4.0+
  • PC
  • ORIGINAL LOGO.BIN FILE
  • AN IMAGE EDITOR

 STEPS
  • Extract the Logo Builder into a fresh folder in your PC
  • Run the executable program
  • Click create project
  • Select the compatible logo.bin file (which works well on your phone, stock recommended)
  • Choose the folder it would unpack the logo into (make sure to create a new folder, e.g. BOOT FOLDER)
  • Wait till extraction is finished
  • Open your image editor and create/edit the photo you wish to add in .png format (make sure you resize it to the exact resolution of your screen - shown below the extracted elements in logo builder). The image shown above was edited and resized to my screen size - 720x1280
  • Copy the edited image into the BOOT FOLDER.
  • Delete the first image in the folder, usually named img1.png (this is the image you see when you boot up your phone ON/OFF).
  • Rename the copied image to  img1.png
  • Delete the last image in the folder which is just a replica of img1.png, usually named img39.png (this is the image you see when you boot up your phone ON/OFF).
  • Rename the copied image to  img39.png
  • Before now, you'd notice that the "Make new logo" button in the logo builder is not clickable. However, after replacing the files with correct .png images of same resolution, you'd be able to click it.
  • Now click make new logo and wait till finished, click ok.
  • Go to the folder you extracted the logo elements into (BOOT FOLDER). You shall see 2 additional files - logo.bin and update.zip
  • Copy the update.zip to the root of your SDcard and flash via recovery.
  • You can also use the logo.bin (the new generated file) to replace in original custom ROMS you wish to port/flash before flashing.


  • Ankadnikov (Dev)

For further details and new version releases, visit the XDA thread and don't forget to hit thanks!


Share:

Like us on facebook

Monetize your blog

Recent Posts

Translate This Page